- 👨🔬 For Researchers -
Glucose data is accessible on Labfront via Dexcom. You can read more about using Dexcom CGM devices with Labfront in this article.
Add new Dexcom integration
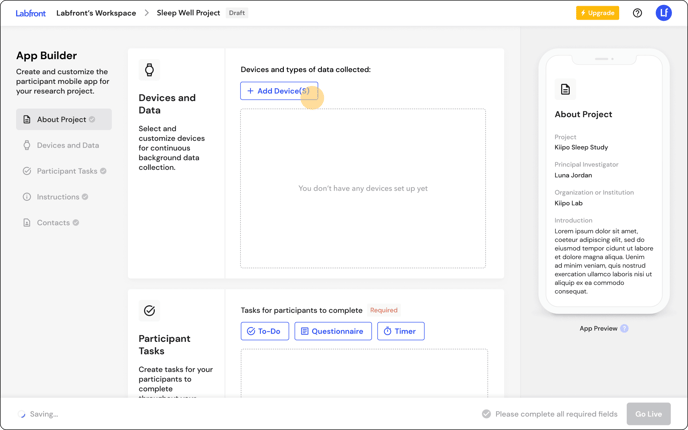
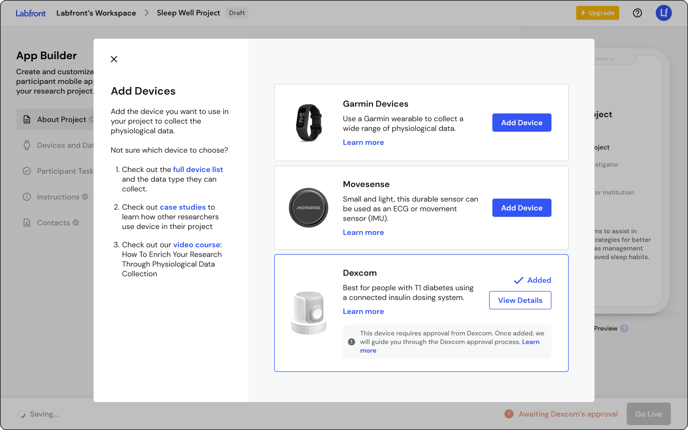
First, select Add Device from the App Builder.
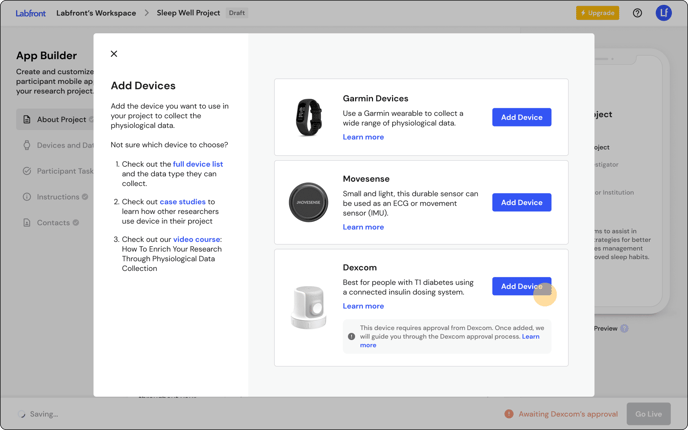
Then, next to Dexcom, select Add Device.
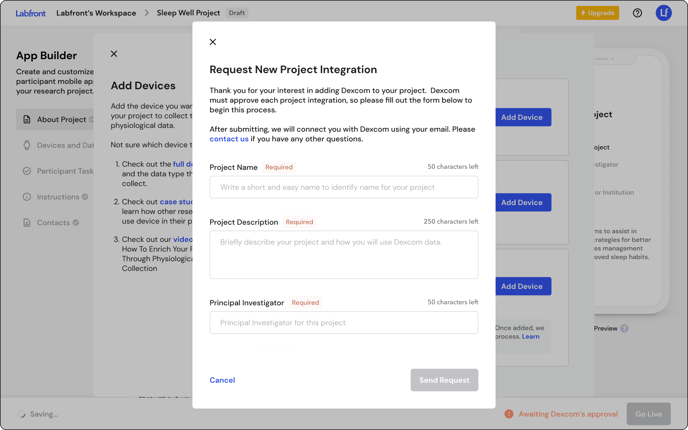
You will now see a pop-up requesting a new project integration. This is because Dexcom requires approval for each project integration to ensure user safety, data privacy, and compliance with regulatory standards. We will guide you through the approval process via email.
You will see Added next to Dexcom if you have linked an integration to your project.
While awaiting Dexcom's approval, your project will not be able to go live. You can view the approval status in the App Builder.
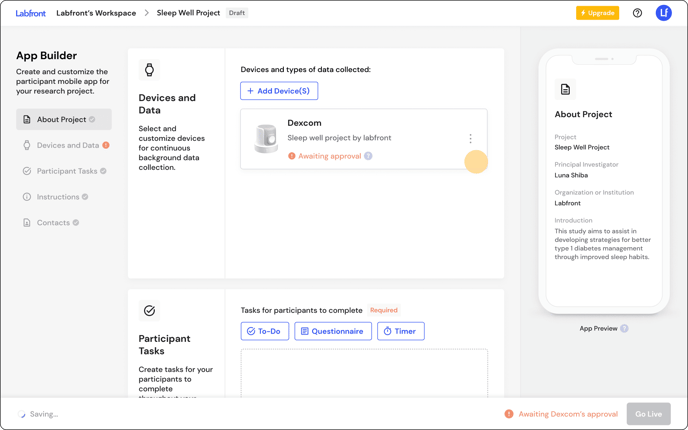
Once the integration has been approved, you will be able to publish your project and add participants.
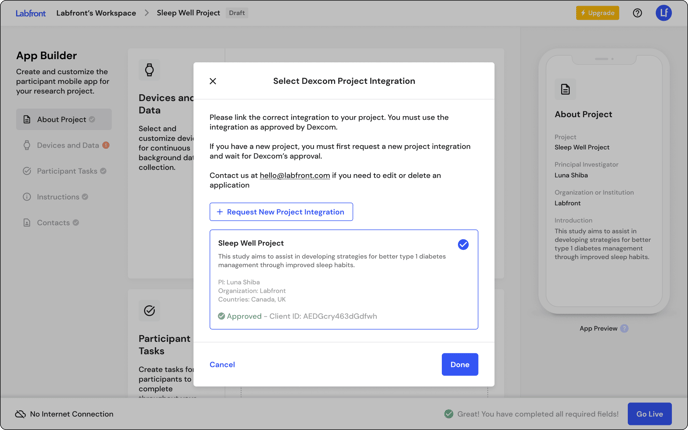
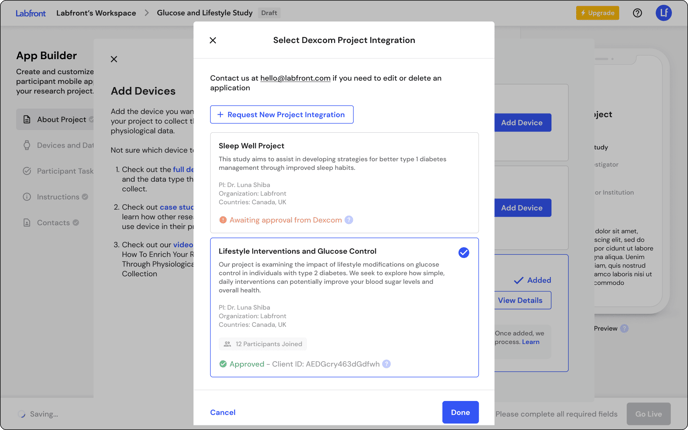
Add existing Dexcom integration
If you already have a Dexcom integration and would like to add it to a project, first, select Add Device from the App Builder. Then, next to Dexcom, select Add Device.
You will now see a pop-up listing any Dexcom integrations that have been added to your Workspace. Select the correct integration to add to your project and click Done.